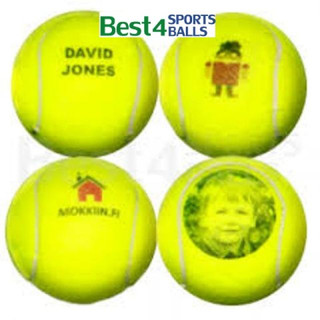
9 Steps To Make Your Own Custom Printed Footballs
- best4sportsballs00
- Jun 22, 2021
- 3 min read
Custom-written football balls square measure in huge demand currently. Several businesses wish their name famous in several formats; one among them square measure football balls. The styles on the football balls might vary: some may wish to transfer their name, logo, or complicated art. Whether or not your graphics vogue could also be, we are going to show you nine steps to create your own Printed Footballs.

What Materials does one get to build Your Own Custom written football Balls?
Household iron is one of the essential print materials you'll want. The method we're attending to show you is easy enough to try and do reception, as you'll notice most of the materials within the comfort of your home. Of course, the most factor you are going to want could be a ball. you'll print your required graphics on that. Next, you are going to want a daily house iron or a mini crafting iron. It all depends on the scale of your graphics. Use the regular house iron if your graphic is larger, and therefore the mini crafting iron if your graphic is smaller in size.
Step 1: Visualize and make a style
You will get to produce killer graphics or offer some other person to make one for your ball. There square measure various graphic style tools around, thus choose one that suits you best, and begin planning. we can add style to your required graphics for you if you do not wish to hassle there with yourself. Also, be at liberty to use our ball Designer Tool to visualize however your graphics can look on the ball!
Step 2: Screen Print your required Graphics
Before you even begin meddling with the ball itself, you wish to transfer the required graphics. once you've got selected your graphics, screen-print the brand on the straightforward weed stretch. Now, you've got a sticker along with your logo! this may be utilized in the succeeding step.
Step 3: Grab the Hotfix Tape and Scissors
Now, you would like to regulate the scale of your sticker for your ball. Grab hotfix tape and use scissors to chop off a region a touch larger than your sticker. After you do that, you'll be ready for the ironing half you're attending to do later!
Step 4: Stick the New Combination
the mixture you created within the last step can face up to the warmth used for the ironing method. So, stick this mix on the ball. You do not wish to use plenty of pressure on the current space. If you would like your graphics on the opposite spot, you'll get to take away the sticker/easy weed stretch combination.
Step 5: Check If the Sticker can soften on the ball
Now, it's sensible to try and do a form of check last the graphics transfer method. Take the mini crafting tool and apply a bit of heat to the sticker space to visualize if it melts. If it's melting, this is often a decent sign; a heat transfer method is happening. Do that very little check initial to not waste materials and football balls, which can simply offer you surplus prices.
Step 6: Heat Transfer your required Graphics
Once you identify that everything goes by the arrange, supported the previous step, simply continue with the warmth transfer method. You'll continue victimization the mini crafting tool if your graphic is tiny enough. Otherwise, use the regular menage iron to heat transfer your print to the ball. Detain mind that straightforward weed material can get compressed a touch once the ball gets tampered with. you would like the straightforward weed to resist the kicks on the ball which will eventually be created once it's prepared for usage.
Step 7: Check the Ball for Bubbles
You will understand that everything goes well if the ball isn't effervescent up and creating extra changes that you just did not wish within the initial place. If their square measure some bubbles left, you'll get to take away them within the safest attainable method.
Step 8: Take away the Hotfix Tape
Before you alter the bubbles on the ball, you'll get to take the hotfix tape off. This may set your graphics free on the ball! you do not wish to destroy the tape before taking it off to not complicate the ultimate steps.
Step 9: beware of the Bubbles
Now is the time to place the chosen tool to alter the bubbles on the ball. Pinch the bubbles with a chosen tool to create them disappear. Repeat this step till all the bubbles square measure gone or hidden from plain sight. Be at liberty to stretch around and kick the ball to ascertain if the place wherever your emblem is found is stable enough.


Comments